
0
Owner's of the Brady Label Maker Brady Label Printer gave it a score of 0 out of 5. Here's how the scores stacked up:


B-8 Cleaning the Stylus
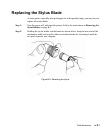
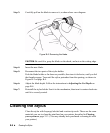
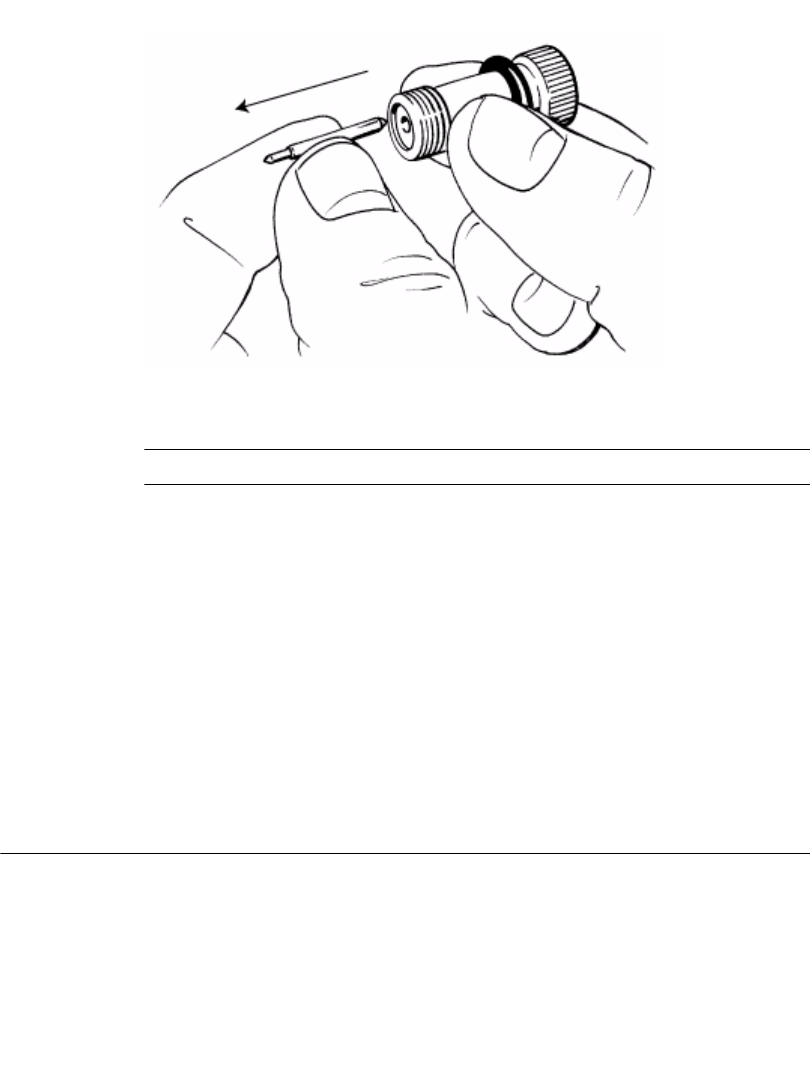
Step 3: Carefully pull on the blade to remove it, as shown here: new diagram
Figure B-6. Removing the blade.
CAUTION:Be careful to grasp the blade on the shank, and not on the cutting edge.
Step 4: Insert the new blade.
Step 5: Reconnect the two parts of the stylus holder:
Push the blade holder as far down as possible, then turn it clockwise, until you feel
the threads engage. Turn until the stylus protrudes from the opening, as shown in
Figure B-2 on page B-4.
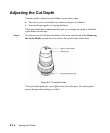
Step 6: Adjust the blade depth. Follow the instructions in Adjusting the Cut Depth on
page B-4.
Step 7: Reinstall the stylus holder. Seat it in the mechanism, then turn it counter-clockwise
until it is securely seated.
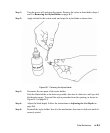
Cleaning the Stylus
Clean the stylus with Isopropyl alcohol and a cotton-tip swab. These are the same
materials you use to clean the print head on your printer, described in Cleaning
your system on page 2-13. (You may already have purchased a cleaning kit with
your printer.)


Find Your Products By Category
- Household Appliance
- Power Tools
- Computer Equipment
- Automotive
- TV and Video
- Outdoor Cooking
- Marine Equipment
- Kitchen Appliance
- Fitness & Sports
- Lawn and Garden
- Baby
- Laundry Appliance
- Personal Care
- Home Audio
- Photography
- Video Game
- Portable Media
- Musical Instruments & Equipment
- Communications
- Car Audio and Video
Please Login
