
0
Owner's of the Brady Label Maker Brady Label Printer gave it a score of 0 out of 5. Here's how the scores stacked up:


6-26 Changing Labels
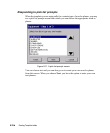
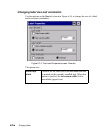
With Match tape size enabled, the system calculates the correct label margins
for the tape currently installed, and updates the Set width and Set length fields
to contain those values
You may not make changes in those fields with Match tape size selected.
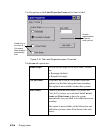
•With Use custom size enabled, you can:
Set a custom width. When you choose Set width, the Set length field
becomes unavailable (grayed out).
or
Set the label length. If you choose Set length, the Set width field is
unavailable (grayed out).
3. Once you make changes, choose:
• OK. Note the changed label size.
• Cancel to restore the default label size.
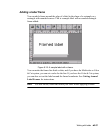
In both cases, you’ll go back to the Select Template screen (Figure 6-8).
4. When you have completed the Select Template screen, choose Next. Even if
you pick a different template than the one selected when you changed size, you
still set a new size.
Editing template labels
Most templates allow you to make changes to the objects placed on a label by the
template. Those templates that do not allow changes will not allow you to perform
the following procedure.
You can edit an object on a template label, or, when you want to make multiple
changes, you can go back through the prompt sequence used to create the label.
To edit an object on a template label
1. After the prompt sequence for creating the label is complete and the label is
displayed in the Editor window, select the object you want to change.
Hint! If the object may not be changed, the system will not allow you to select
the object.
2. Press the <Edit Object> key or choose the Edit Object tool:
The appropriate Graphics screen, Enter Text screen, or whichever
screen is appropriate to the type of object selected appears.


Find Your Products By Category
- Household Appliance
- Power Tools
- Computer Equipment
- Automotive
- TV and Video
- Outdoor Cooking
- Marine Equipment
- Kitchen Appliance
- Fitness & Sports
- Lawn and Garden
- Baby
- Laundry Appliance
- Personal Care
- Home Audio
- Photography
- Video Game
- Portable Media
- Musical Instruments & Equipment
- Communications
- Car Audio and Video
Please Login
