

0
Owner's of the Adam Equipment Building Set Adam Equipment Building Set gave it a score of 0 out of 5. Here's how the scores stacked up:


© Adam Equipment Company 2012
Page
9
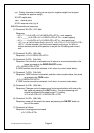
6.0 CALIBRATION
Before calibrating the scale, you should ensure that you have a suitable known
weight for calibration.
1. When in normal weighing mode with the scale at zero press and hold down
[TARE] and [ON / OFF] keys to enter the calibration mode.
2. If the calibration switch is in the off position on the main PCB inside the scale, the
indicator will show “CAL.OFF” and then exit this mode. If the indicator shows “CAL-
?”, the scale is ready for calibration.
3. When the indicator shows “CAL-?”, press the [TARE] key to confirm and go to
next step, or press the [ON / OFF] key to exit the calibration mode.
4. When ‘0.0
0.00.0
0.0’ is displayed the scale will begin to calibrate the scale’s zero-point.
Ensure that there is no load or weight on the scale’s platform. Press the [TARE]
key to confirm, or press the [ON / OFF] key to exit this mode.
5. A few seconds after the [TARE] key has been pressed in step 4 the scale will
show “300.0” and the kg LED, or “600.0” and the lb LED depending on which unit
you chosen, this is the default calibration weight from the factory. Press the
[UNIT] key to select the calibration weight unit that you want to calibrate in. Press
the [ON / OFF] key to exit the calibration mode at this point or press the
[Print/Hold] key to choose a different calibration weight value (50kg, 100kg,
150kg, 200kg, 250kg, 300kg or 100lb, 200lb, 300lb, 400lb, 500lb, 600lb); Then
put on the weight that you selected and press the [TARE] key to confirm the
chosen standard weight that was selected earlier. The displayed data will flash
on the display and if the scale accepts the calibration data it will calculate and
store the information into the EEPROM. If an error has occurred, the scale will
display “CAL. Er” and return back to step 4 for re-calibration. If the loaded weight
is not within the range of 95% to 105% of the weight value you selected, the
scale will not calibrate but display “CAL. Er” and return back to step 4 for re-
calibration. )
6. Check the calibration by putting the weight that you calibrated at back on the
scale, if it is off repeat the calibration process again.


Find Your Products By Category
- Household Appliance
- Power Tools
- Computer Equipment
- Automotive
- TV and Video
- Outdoor Cooking
- Marine Equipment
- Kitchen Appliance
- Fitness & Sports
- Lawn and Garden
- Baby
- Laundry Appliance
- Personal Care
- Home Audio
- Photography
- Video Game
- Portable Media
- Musical Instruments & Equipment
- Communications
- Car Audio and Video
Please Login
