
0
Owner's of the World Marketing of America Outdoor Fireplace KOZY-WORLD gave it a score of 0 out of 5. Here's how the scores stacked up:


8
INSTALLATION
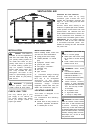
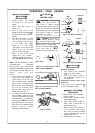
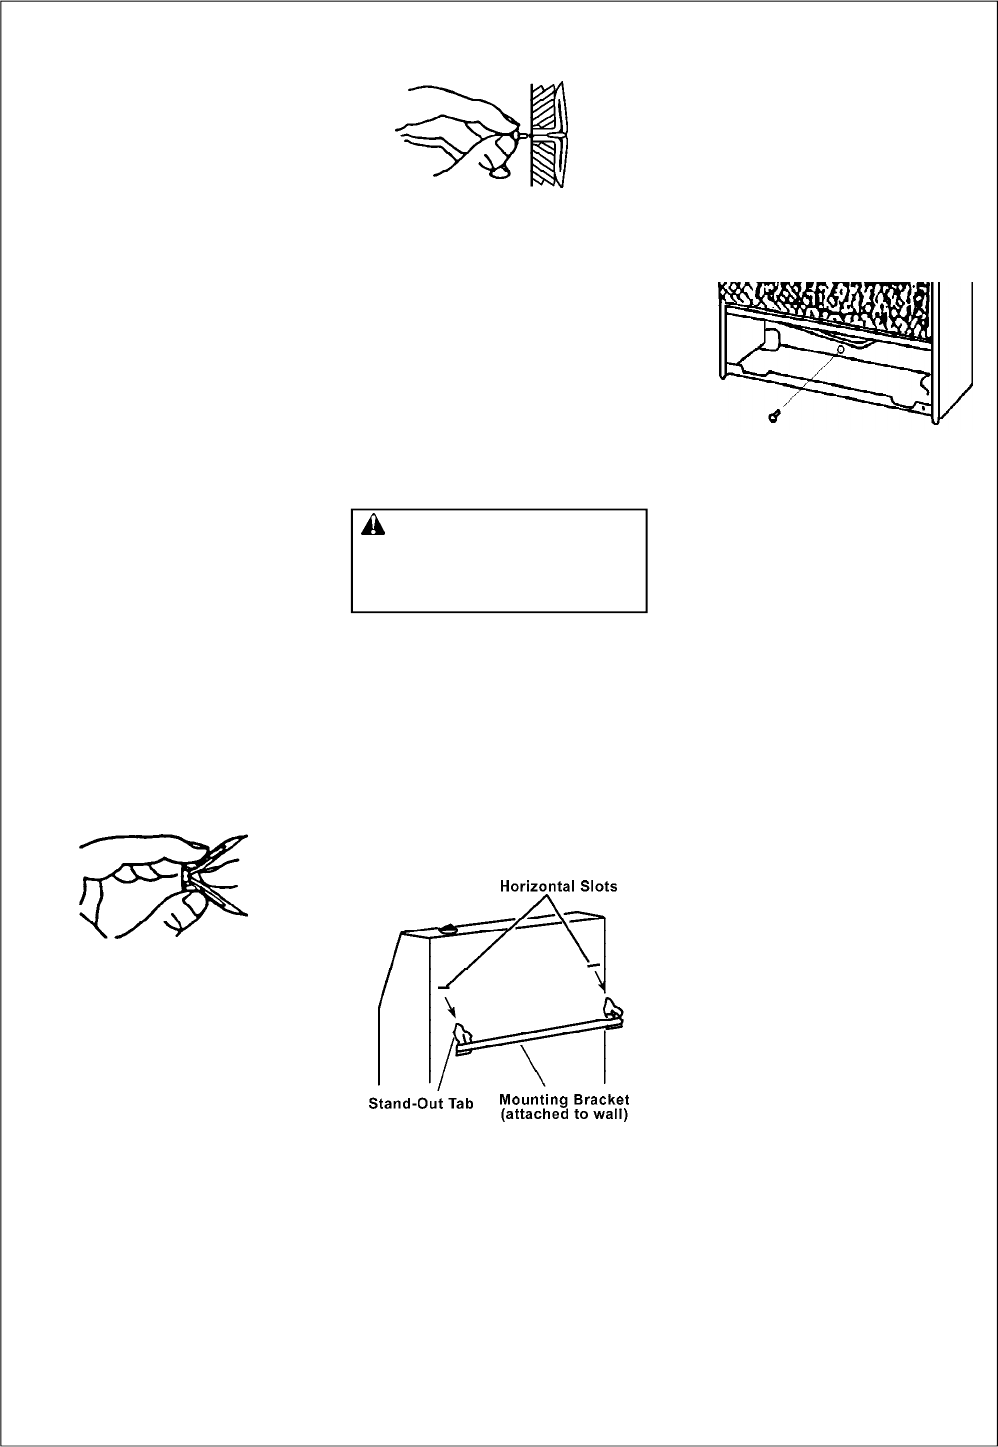
Figure 10 - Mounting Heater Onto
Mounting Bracket
Placing Heater on Mounting
Bracket
1. Locate two horizontal slots on
back panel of heater (see
Figure 10).
2. Place heater onto mounting
bracket. Slide horizontal slots
onto stand-out tabs on
mounting bracket.
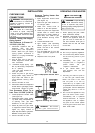
Installing Bottom Mounting
Screws
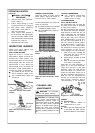
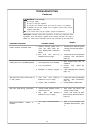
1. Locate bottom mounting hole. This
hole is near bottom on back
panel of heater (see Figure 11).
2. Mark screw locations on wall.
3. Remove heater from mounting
bracket.
4. If installing bottom mounting
screw into hollow or solid wall,
install wall anchors. Follow
steps 1 through 4 under Attach
ing to Wall Anchor Method. If
installing botto mounting screw
into wall stud, drill holes at
marked locations using 9/64"
drill bit.
5. Replace heater onto mounting
bracket.
6. Place spacers between bottom
mounting holes and wall anchor
or drilled hole.
7. Hold spacer in place with one
hand. With other hand, insert
mounting screw through bottom
mounting hole and spacer. Place
tip of screw in opening of wall
anchor or drilled hole.
8. Tighten screw until heater is firmly
secured to wall. Do not over
tighten.
l Note: Do not replace lower front
panel at this time. Replace loweer
front panel after making gas
connections and checking for
leaks (see page 9).
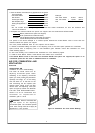
Attaching Mounting Bracket To
Wall
Note: Wall anchors, mounting
screws, and spacers are in
hardware package. The hardware
package is provided with heater.
Attaching to Wall Stud Method
For attaching mounting bracket to
wall studs
1. Drill holes at marked locations
using 9/64" drill bit.
2. Place mounting bracket onto
wall. Line up last hole on each
end of bracket with holes drilled
in wall.
3. Insert mounting screws through
bracket and into wall studs.
4. Tighten screws until mounting
bracket is firmly fastened to
wall studs.
Attaching to Wall Anchor Method
For attaching mounting bracket to
hollow walls (wall areas between
studs) or solid walls (concrete or
masonry)
1. Drill holes at marked locations
using 5/16" drill bit. For solid
walls (concrete or masonry),
drill at least 1" deep.
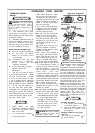
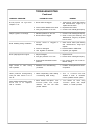
2. Fold wall anchor as shown in
Figure 8 below.
3. Insert wall anchor (wings
first) into hole. Tap anchor
flush to wall.
4. For thin walls (1/2" or less),
insert red key into wall
anchor. Push red key to
"pop" open anchor wings.
(see Figure 9).
Figure 8 - Folding Anchor
Figure 9 - Popping Open Anchor
Wing For Thin Walls
5. Place mounting bracket onto
wall. Line up last hole on
each end of bracket with wall
anchors.
6. Insert mounting screws through
bracket and into wall anchors.
7. Tighten screws until mounting
bracket is firmly fastened to
wall.
IMPORTANT: Do not
hammer key! For thick walls
(over 1/2" thick) or solid walls,
do not pop open wings.
Figure 11 - Installing Bottom
Mouting Screw


Find Your Products By Category
- Household Appliance
- Power Tools
- Computer Equipment
- Automotive
- TV and Video
- Outdoor Cooking
- Marine Equipment
- Kitchen Appliance
- Fitness & Sports
- Lawn and Garden
- Baby
- Laundry Appliance
- Personal Care
- Home Audio
- Photography
- Video Game
- Portable Media
- Musical Instruments & Equipment
- Communications
- Car Audio and Video
Please Login
