
4.0
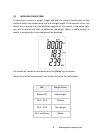
Owner's of the Adam Equipment Treadmill Adam Equipment Treadmill gave it a score of 4.0 out of 5. Here's how the scores stacked up:
15
© Adam Equipment Company 2012
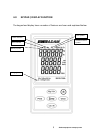
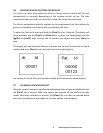
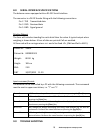
1) Switch on the scale then press the [kg/lb] key during the self-checking test of
the display.
2) The display will show the first function
F1
F1F1
F1
EL.
EL.EL.
EL.
3) Press the [kg/lb] key to select
F
FF
F8
88
8
SET
SETSET
SET
UP
UPUP
UP
and then [Zero] to enter and show the
first parameter.
4) Press the [Print] key to change the setting and [Zero] to save and move to the
next parameter, press [cm/ft] to exit.
To return to normal operation turn the scale OFF and then ON again.
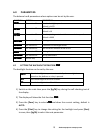
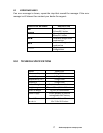
6.9
TECHNICAL
PARAMETERS
F9
F9F9
F9
TECH
TECHTECH
TECH
This is a menu available only to qualified service personnel for factory adjustments.
7.0 USER
CALIBRATION
1)
Switch on the scale and whilst the display counts down press the [Clear] key.
2) The display will show kg or lb, press [Print] to select the unit of weight being
used for the calibration and then [Zero] to confirm.
3) The display will show CAL XX (XX being the last calibration weight to be used).
4) Press the [Print] key to change the value if required and [Zero] to confirm.
5) The display will show the Zero A-D which should be stable.
6) Press the [Zero] key to confirm the Zero point and the display will show LOd
XX (XX being the calibration weight value to be loaded onto the top pan).
7) Load the top pan with the calibration weight and press the [Zero] key.
8) The display will show “PASS” for a successful calibration and return to normal
weighing displaying the calibration weight value correctly.
9) Remove the weight from the pan and the scale will return to Zero.
*A print out with date and time can be issued following every calibration.
If an error code was displayed when calibrating please see the error code
table in section 9.1


Find Your Products By Category
- Household Appliance
- Power Tools
- Computer Equipment
- Automotive
- TV and Video
- Outdoor Cooking
- Marine Equipment
- Kitchen Appliance
- Fitness & Sports
- Lawn and Garden
- Baby
- Laundry Appliance
- Personal Care
- Home Audio
- Photography
- Video Game
- Portable Media
- Musical Instruments & Equipment
- Communications
- Car Audio and Video
Please Login
