
0
Owner's of the Samsung Digital Camera Samsung Network Camera gave it a score of 0 out of 5. Here's how the scores stacked up:
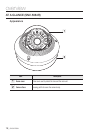

installation & connection
24_ installation & connection
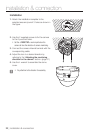
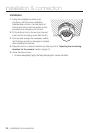
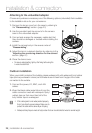
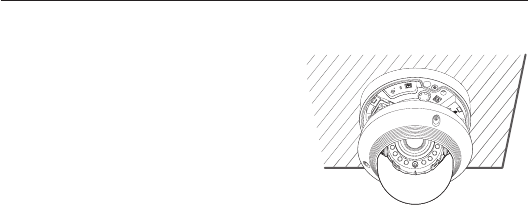
Installation
1. Using the template provided as an
accessory, drill the screw installation
hole(diameter of 6mm, minimal depth of
55mm) and firmly insert the plastic anchor
provided as an accessory to the end.
2. Fit the bottom hole to the anchor hole and
insert and fix the taping screw (M4.5xL50).
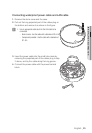
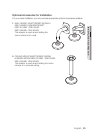
3. Connect and arrange the necessary cables
lest that they should be damaged or twisted
while installing the camera.
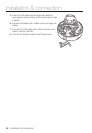
4. Adjust the lens in a desired direction by referring to the “Adjusting the monitoring
direction for the camera” section. (page 31)
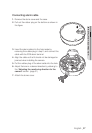
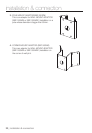
5. Close the dome cover.
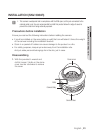
`
To ensure waterproofing, tight up the fixing bolts using the L-wrench and drill bit.
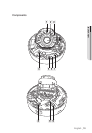
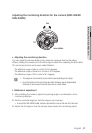
AC 24V / DC 12V
RESET
VIDEO
F
W
AF
T
N
+ -
AC 24V / DC 12V
RESET
VIDEO
F
W
AF
T
N
+ -
AC 24V / DC 12V
RESET
VIDEO
F
W
AF
T
N
+ -
AC 24V / DC 12V
RESET
VIDEO
F
W
AF
T
N
+ -
AC 24V / DC 12V
RESET
VIDEO
F
W
AF
T
N
+ -


Find Your Products By Category
- Household Appliance
- Power Tools
- Computer Equipment
- Automotive
- TV and Video
- Outdoor Cooking
- Marine Equipment
- Kitchen Appliance
- Fitness & Sports
- Lawn and Garden
- Baby
- Laundry Appliance
- Personal Care
- Home Audio
- Photography
- Video Game
- Portable Media
- Musical Instruments & Equipment
- Communications
- Car Audio and Video
Please Login
