
4.5
Owner's of the Life Fitness Home Gym NOT FOUND gave it a score of 4.5 out of 5. Here's how the scores stacked up:

7
1.2 SETUP
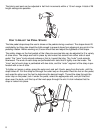
Read the entire Operation Manual before setting up the Lifecycle exercise bike.
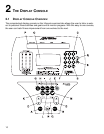
WHERE TO PLACE THE LIFECYCLE
®
EXERCISE BIKE
Following all safety instructions in Section 1.1, move the bike to the location in which it will be
used. See Section 7, titled Specifications, for the dimensions of the footprint. Allow a distance of
8 to 12 inches, or 21 to 30 centimeters, between the bike and other objects or surfaces on either
side. Allow a distance of 3 feet, or 1 meter, from the front or rear of the bike to any other object
or surface.
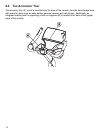
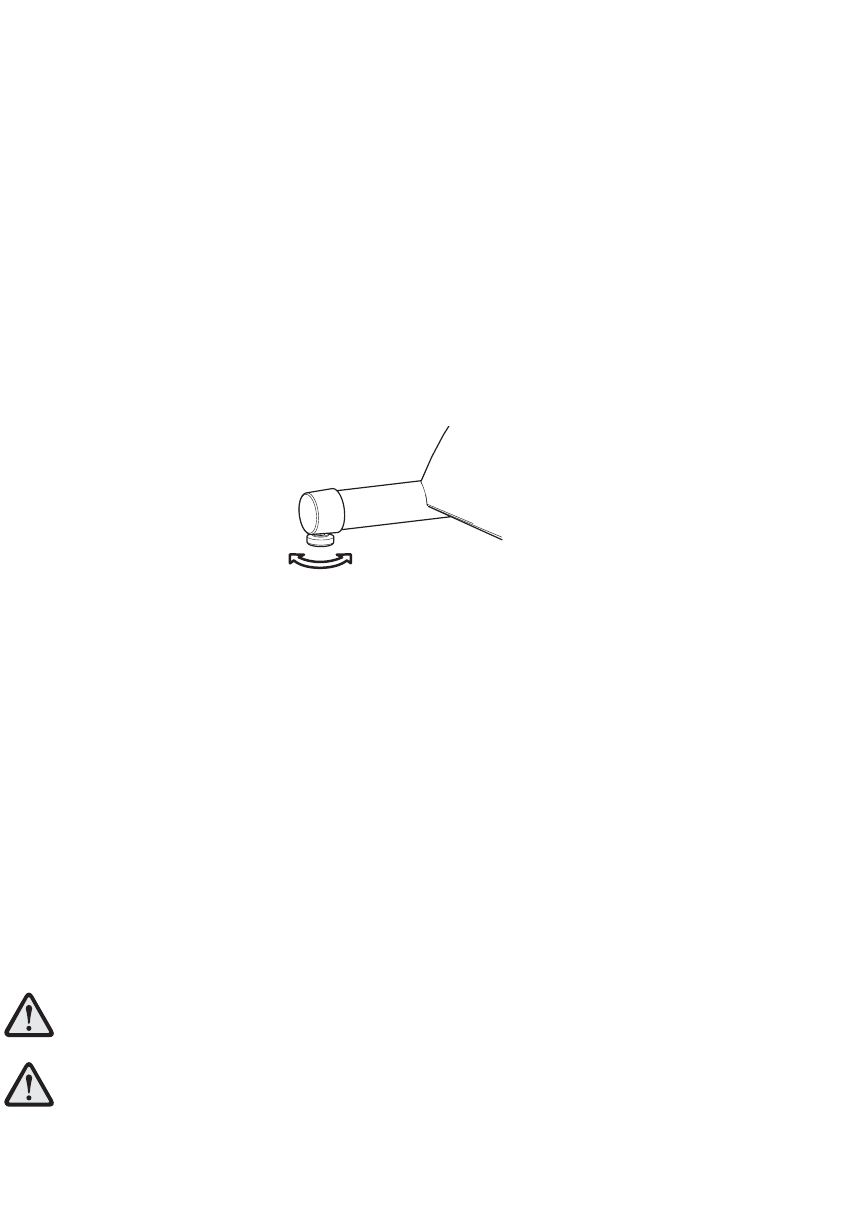
HOW TO
STABILIZE THE LIFECYCLE E
XERCISE BIKE
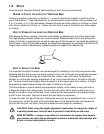
After placing the bike in position, check the unit’s stability by attempting to rock it from side to side.
Any slight rocking indicates that the unit must be leveled. Determine which foot is not resting com-
pletely on the floor. Loosen the jam nut with an open-end 9/16-inch wrench, and rotate the stabilizing
foot to lower it. Verify that the bike is stable, and repeat the adjustment as necessary until the unit no
longer rocks. Lock the adjustment by tightening the jam nut against the stabilizer bar.
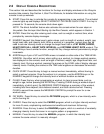
HOW TO ADJUST THE SEAT
It is important to adjust the seat to an optimal height for pedaling on the Lifecycle exercise bike.
Pedaling with the seat too low can place excessive strain on the knees and quadriceps muscles.
Pedaling with the seat too high can irritate the feet, ankles, hips, and knees. To determine
whether or not the seat requires adjustment, sit on it and place the balls of the feet on the ped-
als. The knee should bend slightly when the pedal is at the lowest point of its rotation. It should
be possible to pedal without locking the knees or shifting in the seat.
The bike features a vertical ratchet seat adjustment system, which makes it easy and safe to
change the height of the seat quickly. To raise the seat, either lift the body so that there is no
weight on the seat, or get off the bike. Then, simply pull the seat upward to the desired height,
and let it lock into place. Test and re-adjust the seat height as necessary.
To lower the seat, first get off the bike. Holding the seat, pull up the adjustment lever in front of
the seat post to unlock the post, let the seat slide down to the desired height, and release the
lever to lock the post into place. Test and re-adjust the seat height as necessary.
CAUTION: When using the height adjustment mechanism to change the height of
a partially raised seat, hold the seat to prevent it from falling on the hand.
MISE EN GARDE - Lorsque vous utilisez le mécanisme de réglage de la hauteur
pour monter une selle déjà partiellement surélevée, maintenez cette dernière afin
qu'elle ne vous tombe pas sur la main.


Find Your Products By Category
- Household Appliance
- Power Tools
- Computer Equipment
- Automotive
- TV and Video
- Outdoor Cooking
- Marine Equipment
- Kitchen Appliance
- Fitness & Sports
- Lawn and Garden
- Baby
- Laundry Appliance
- Personal Care
- Home Audio
- Photography
- Video Game
- Portable Media
- Musical Instruments & Equipment
- Communications
- Car Audio and Video
Please Login
