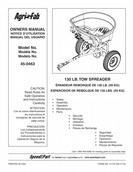

4.0
Owner's of the Agri-Fab Spreader 45-0463 gave it a score of 4.0 out of 5. Here's how the scores stacked up:


7
MAINTENANCE
CHECK FOR LOOSE FASTENERS
Beforeeachuse,makeathoroughvisualcheckofthe1.
spreaderforanyboltsandnutswhichmayhave
loosened.Retightenanylooseboltsandnuts.
CHECK FOR WORN OR DAMAGED PARTS
Checkforwornordamagedpartsbeforeeachuse.2.
Repair or replace parts if necessary.
CHECK TIRE INFLATION
Checkiftiresareadequatelyinatedbeforeeachuse.3.
Donotinatetiresbeyondmaximumrecommended
pressure on tire.
CLEANING
Rinseinsideofhopperandexteriorofspreaderand4.
allowtodrybeforestoring.
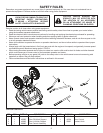
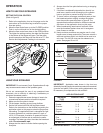
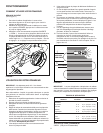
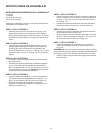
LUBRICATE(Seegure9)
Removethethreeclipsfromthegearboxand5.
separatethegearboxhousings.
Lightlyapplyautomotivegreaseasneededtothe6.
gears.
Lightlyoilthetopofthegearboxandthevertical7.
spreadershaft.
Re-assemblethegearboxhousingsandsecurethem8.
withtheclips.
Oilthe(idler)wheelandtheaxlebushingsatleast9.
once a year or more often as needed.
STORAGE
Rinseinsideofhopperandexteriorofspreaderand1.
allowtodrybeforestoring.
Storeinaclean,dryarea.2.
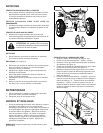
FIGURE 10
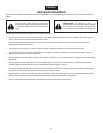
FIGURE 11
CAUTION: DO NOT inatetiresbeyondthe
maximumrecommendedpressureprinted
on side of tire.
SERVICE AND ADJUSTMENTS
Iftheaxleandgearassemblyisdisassembled,mark1.
downthepositionsofthepartsastheyareremoved.
Thedrivewheelandlargegearpositions,inrelation
tothesmallgear,determinewhichdirectionthe
impellerwillspin.Besuretoreassemblethemintheir
originalpositions.(Refertopartsexplodedviewon
page18).Makesurethewashers(items18and31
onpage18and19)areinplacewhenassemblingthe
axlecomponents.Addgreasetogears.Seegure10.
OIL
GREASE
CLIP
CLIP
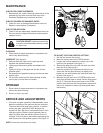
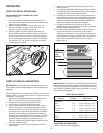
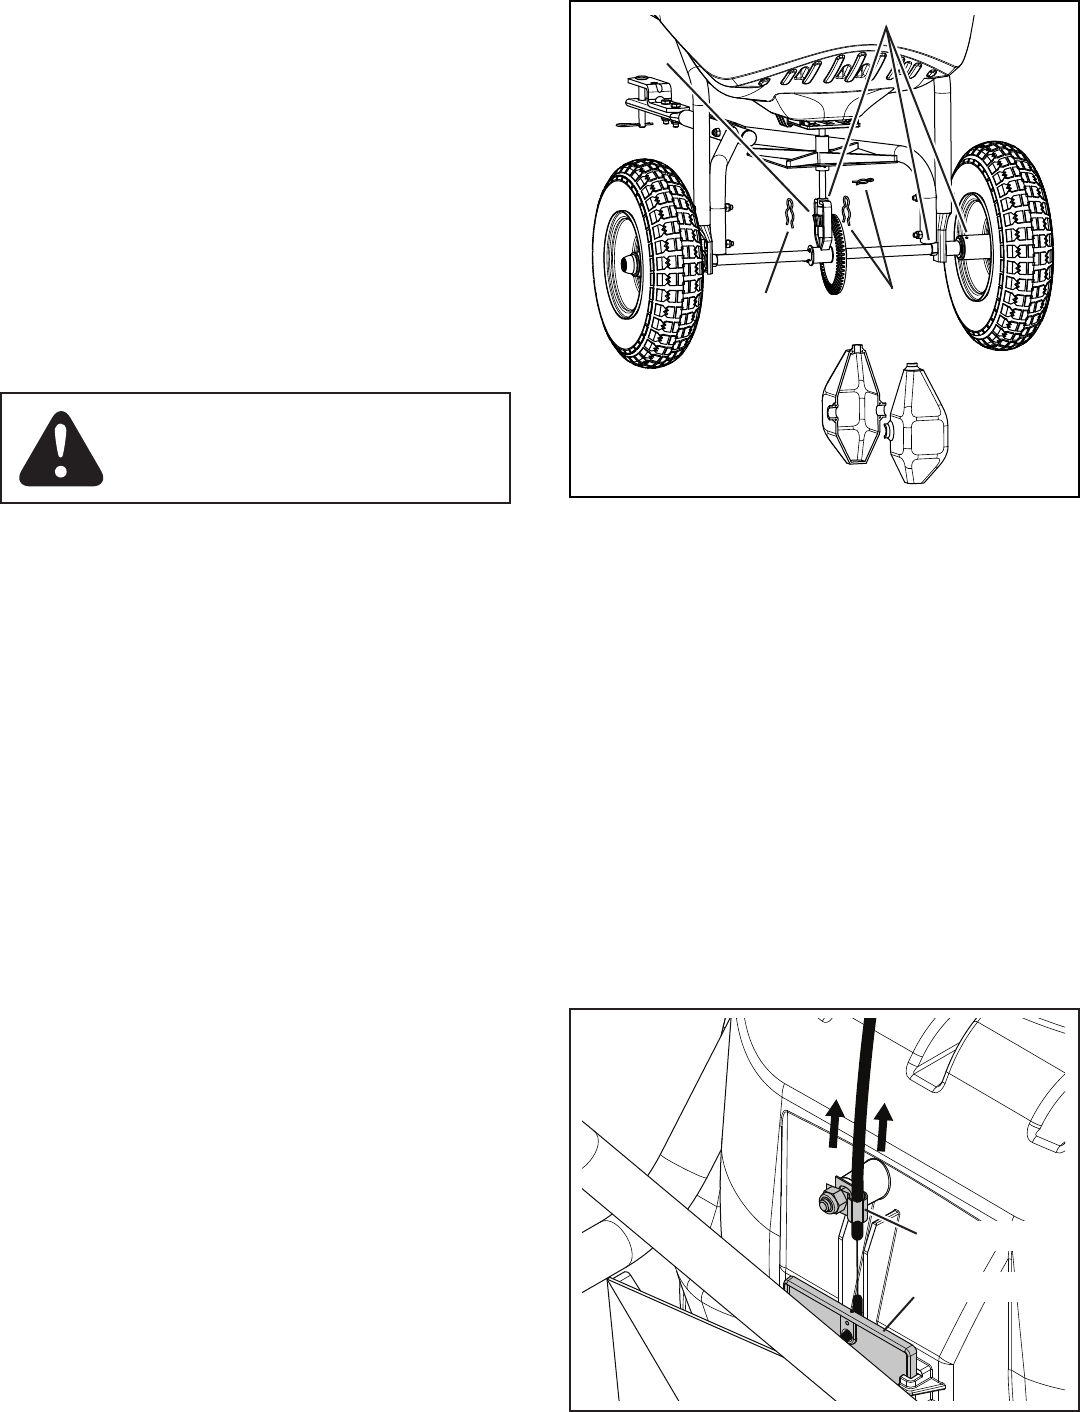
TO ADJUST THE FLOW CONTROL SETTING
Settheowcontroldialtozero.1.
MovethecontrollevertotheOPENposition.2.
Loosenthenutthatfastenstheconduitcliptothe3.
bottomofthespreader.Seegure11.
Spreadtheendsoftheclipuntilthecablecanslide4.
backandforth.Seegure11.
Holdtheconduitclipinalignmentandpullonthe5.
cableuntiltheowplatemovesjustslightly,then
tightenthenutwhileholdingthecableandcableclip
inplace.Seegure11.
MovethecontrollevertotheCLOSEDpositionand6.
verifythattheowplateisclosed.Settheowcontrol
dialat"5".MovetheowcontrollevertotheOPEN
positionandverifythattheowplatehasopenedhalf
way.Ifnot,loosentheconduitclipandrepeatthese
instructions.
CONDUIT CLIP
FLOW PLATE
NOTE:Crossbracenotshownforclarity.


Find Your Products By Category
- Household Appliance
- Power Tools
- Computer Equipment
- Automotive
- TV and Video
- Outdoor Cooking
- Marine Equipment
- Kitchen Appliance
- Fitness & Sports
- Lawn and Garden
- Baby
- Laundry Appliance
- Personal Care
- Home Audio
- Photography
- Video Game
- Portable Media
- Musical Instruments & Equipment
- Communications
- Car Audio and Video
Please Login
