

0
Owner's of the Acroprint Time Clock ES900 gave it a score of 0 out of 5. Here's how the scores stacked up:


40
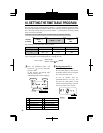
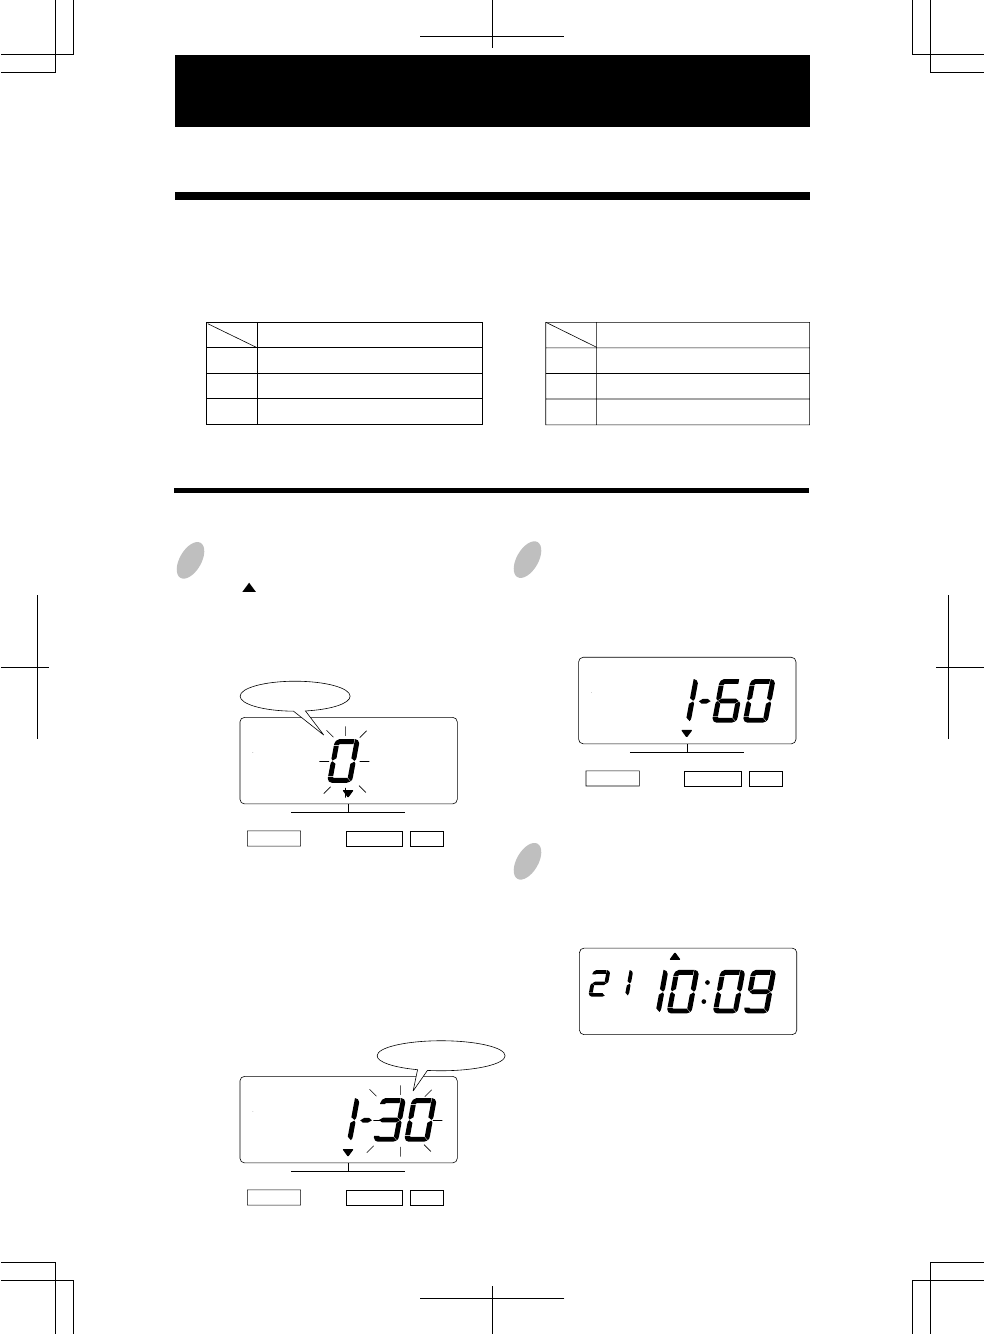
20. SETTING THE SLAVE CLOCK
42
40
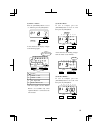
1
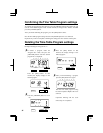
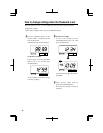
Press the [SELECT] button and position
the " "up the "SLAVE CLOCK" mark.
At that moment, the flashing digit
indicates "Clock Options".
(The flashing means it can be changed.)
2
Set the "Clock Options".
In case of the example, press the
[CHANGE] button to set at "1".
And then press the [SET] button.
At that moment, the flashing changes
from the "Clock Options" to "Signal
Options".
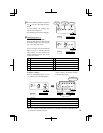
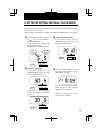
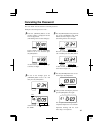
Set the "Signal Options".
In case of the example, press the
[CHANGE] button to set at "60".
And then press the [SET] button.
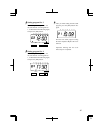
3
After you finish setting the slave
clock, press the [SET] button once
again.
Now the slave clock setting has been
completed. Replace the cover and
lock.
Important: Printing will not occur
unless Step 3 is completed.
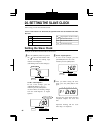
In this setup, you can select the Slave Clock.
Note: For this feature to be functional, the optional board must be installed in the Time
Recorder.
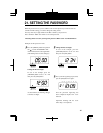
0.
1.
2.
Clock Options
Disabled
Slave Clock
N/A
30.
60.
59.
Signal Options (for Slave Clock)
30-second reversal
60-second reversal
59-minute impulse
Setting the Slave Clock
Example: Set the Slave Clock and 60-second reversal.
SELECT CHANGE SET
SLAVE CLOCK
Clock Options
SELECT CHANGE SET
SLAVE CLOCK
SELECT CHANGE SET
SLAVE CLOCK
MO TU WE TH FR SASU
Signal Options


Find Your Products By Category
- Household Appliance
- Power Tools
- Computer Equipment
- Automotive
- TV and Video
- Outdoor Cooking
- Marine Equipment
- Kitchen Appliance
- Fitness & Sports
- Lawn and Garden
- Baby
- Laundry Appliance
- Personal Care
- Home Audio
- Photography
- Video Game
- Portable Media
- Musical Instruments & Equipment
- Communications
- Car Audio and Video
Please Login
