
0
Owner's of the Acroprint Time Clock ES1000 gave it a score of 0 out of 5. Here's how the scores stacked up:


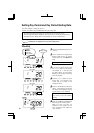


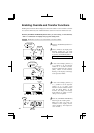
You will not be allowed to change pay period while in a current pay period.
Error message E-49 will be displayed. You may change a current pay period after you
reset all time cards. Please refer to "Card Resetting" section of this manual.
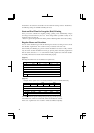
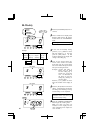
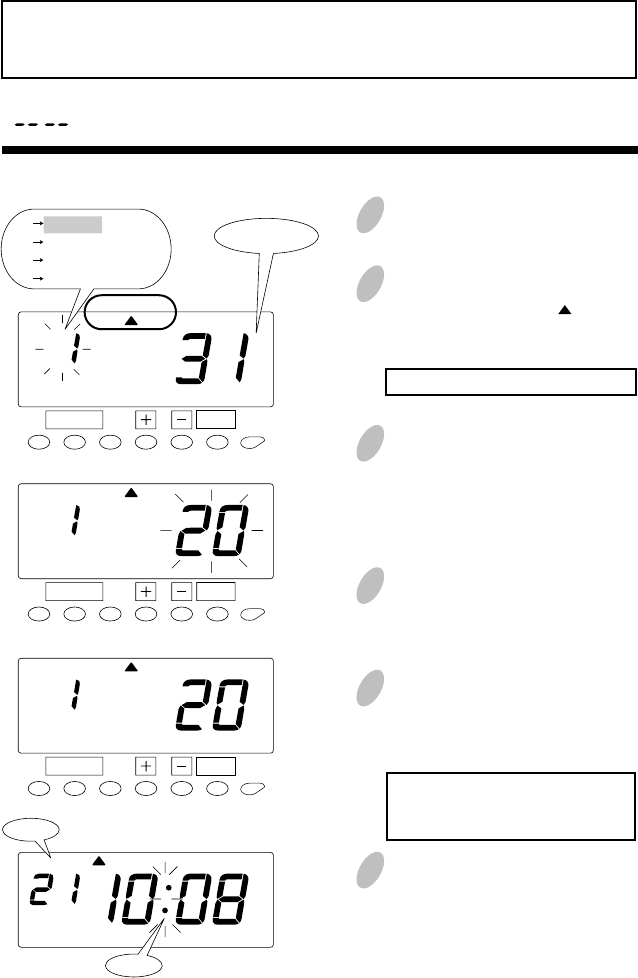
Push the [SETTING START/END] button before you start setting. At that moment,
" " is indicated on a display and you go into setting mode.
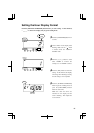
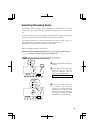
Setting Pay Period and Pay Period Ending Date
1
Push the [FUNCTION] button for 2
seconds.
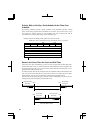
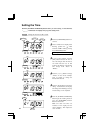
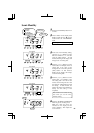
3
In the case of monthly ending, Push
the [+] or [-] button to set the left-
side number at "1" and then push
the [SET] button. At that moment,
flashing of the display will change
to the closing date.
4
Push the [+] or [-] button to set the
desired date. For example, if the
ending date is the 20th, set the
ending date at 20.
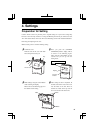
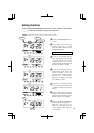
5
Push the [SET] button to finish the
setting. At that moment, the display
will change from flashing to steady,
and the setting is now completed.
Date and time are recorded on the
card when you set the monthly
ending.
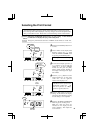
6
Push the [SETTING START/END]
button to get out of setting mode.
Make sure "date" and "time" are
indicated on the display and the
colon is flashing. Then replace the
cover and lock.
2
Once a number on the display starts
flashing, make sure the " " mark is
located under the "PAY PERIOD"
mark.
A flashing number can be changed.
22
16
SET
FUNCTION
AM
Date
Colon
Monthly
PAY PERIOD
Ending date
1 Monthly
2 Weekly
3 Bi-Weekly
4 Semi-Monthly
SET
FUNCTION
PAY PERIOD
SET
FUNCTION
PAY PERIOD
The clock default is "weekly pay period".
All time cards will be reset automatically after pay ending date.


Find Your Products By Category
- Household Appliance
- Power Tools
- Computer Equipment
- Automotive
- TV and Video
- Outdoor Cooking
- Marine Equipment
- Kitchen Appliance
- Fitness & Sports
- Lawn and Garden
- Baby
- Laundry Appliance
- Personal Care
- Home Audio
- Photography
- Video Game
- Portable Media
- Musical Instruments & Equipment
- Communications
- Car Audio and Video
Please Login
