

0
Owner's of the 3M Marine Instruments SpotOn(TM) Temperature Monitoring System gave it a score of 0 out of 5. Here's how the scores stacked up:

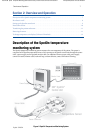
10 Overview and Operation
English 202052A
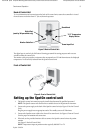
Check the 3M
TM
SpotOn
TM
Temperature Monitoring System website to ensure you have the most recent version of this document. www.spotontemperature.com reorder #202052A
Instructions for use
1. Ensure the SpotOn system power supply is
connected to the back of the control unit and
the power supply is plugged into an appropriate
outlet. If desired, ensure the provided monitor
cable is connected to the back of the SpotOn
control unit and to the YSI-400 type input on the
patient monitor.
2. Use an alcohol wipe to clean and disinfect the
patient’s forehead above the orbital ridge. Allow
the patient’s forehead to completely dry.
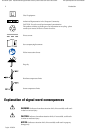
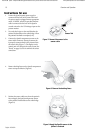
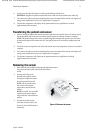
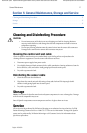
3. Connect the SpotOn temperature sensor to the
sensor cable connector. Ensure the sensor tab
is properly connected and is fully inserted into
the sensor cable (Figure 7). e display on the
control unit will change to the ready screen (See
“Ready” on page 14) once it conrms the sensor
connection.
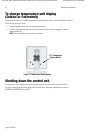
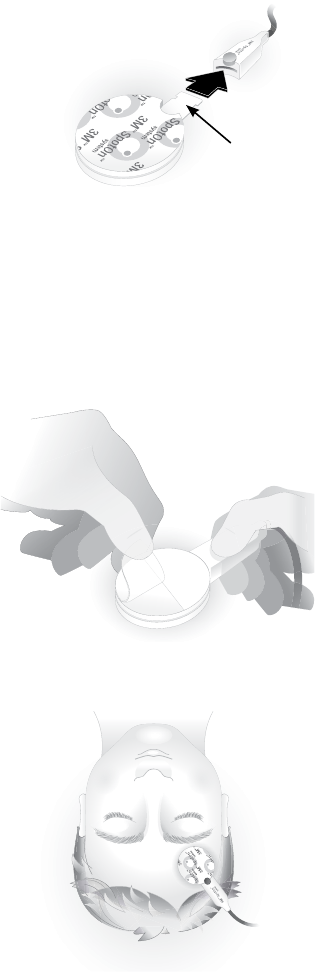
4. Remove backing liners on the SpotOn temperature
sensor to expose adhesive (Figure 8).
5. Position the sensor cable away from the patient’s
face and apply the SpotOn temperature sensor
to the patient’s forehead above the orbital ridge
(Figure 9).
Sensor Tab
Figure 7: Connect the sensor to the
sensor cable
Figure 8: Remove the backing liners
Figure 9: Apply the SpotOn sensor to the
patient’s forehead


Find Your Products By Category
- Household Appliance
- Power Tools
- Computer Equipment
- Automotive
- TV and Video
- Outdoor Cooking
- Marine Equipment
- Kitchen Appliance
- Fitness & Sports
- Lawn and Garden
- Baby
- Laundry Appliance
- Personal Care
- Home Audio
- Photography
- Video Game
- Portable Media
- Musical Instruments & Equipment
- Communications
- Car Audio and Video
Please Login
