
0
Owner's of the Aiphone Intercom System IAX-100 gave it a score of 0 out of 5. Here's how the scores stacked up:


- 5 -
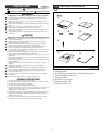
English
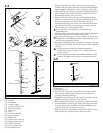
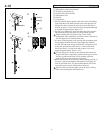
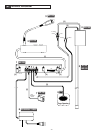
Acoustic interface
[1] Center of acoustic I/O tube
[2] Customer
[3] Barrier glass
[4] Upper acoustic tube (2)
[5] Upper acoustic tube (1)
[6] Acoustic I/O tube
[7] Lower acoustic tube
[8] Driver unit
[9] Tube fixer
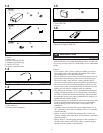
1.
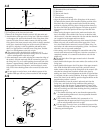
Estimate the average height of customers, taking into account
gender and age differences. Mark on the glass the height where
the average customer's head would be during a conversation with
the operator. Customers usually bend down a little when they talk.
• Recommendation: 130cm (51") above the floor
• If voices can pass directly through the cash tray opening, this can
be used for communication with customers who are children. If
the window has such an opening, children can be excluded from
the average height estimate.
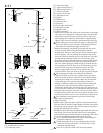
2. Referring to the diagram, measure the vertical dimension of the
barrier glass of the booth in the area where you intend to install
the tubes, and decide how many acoustic tubes are necessary.
• At least one acoustic I/O tube must be used.
• The total length of the acoustic tube is 1m (3'3"), and it must be
installed on both the upper and lower sides of the acoustic I/O
tube. It is possible to cut the acoustic tube and use the pieces
above and below the acoustic I/O tube.
The position measurements you have made will be used
during installation, so be sure to record them.
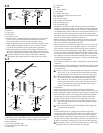
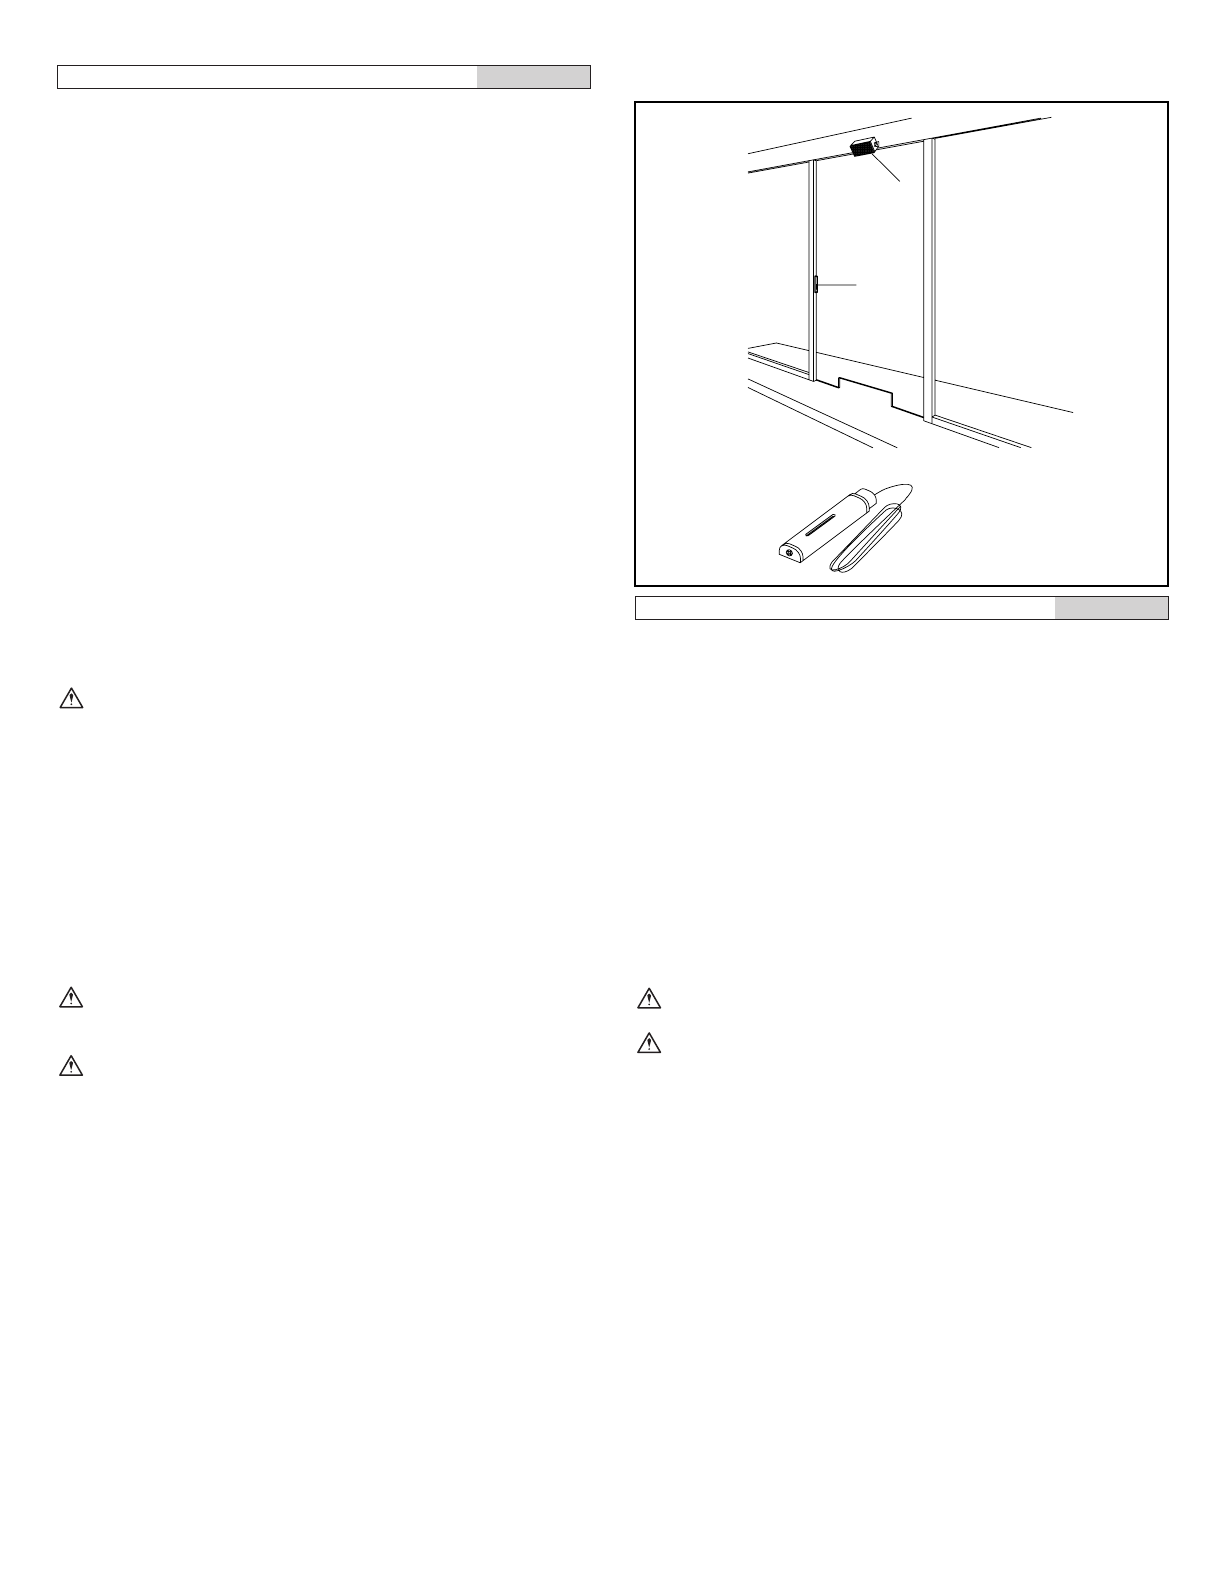
3. Determine the position on the exterior of the barrier glass.
•The optimum position is with the center of the acoustic I/O tube
at the height of the customer's mouth, and 300mm to 400mm
(12"to 16") to the right or left.
•Install the driver unit in the position where the glass and ceiling
meet (sash).
•Install the acoustic tube vertically on either the left or right side
of the customer, whichever is more appropriate.
•Be sure to install the tube not just simply by attaching it to the
glass, but also by using the screws to fix it to the ceiling at the
top and the counter at the bottom.
1. If liquid or moisture gets into the acoustic tube it could
result in a malfunction, so select the installation position
carefully.
2. The sections below the driver unit (acoustic tube, acoustic
I/O tube) are water-resistant. Even so, do not directly spray
them with water, as it could result in a malfunction.
3-3
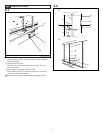
English
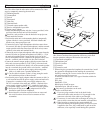
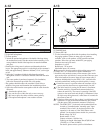
Outer microphone/speaker
The system can be used with an optional microphone and external
speaker if the acoustic interface kit and acoustic tube are not
installed.
[1] Optional microphone IME-150
[2] External speaker
•Use one optional microphone. The optimum position is at the
height of the customer's head, and 300mm to 400mm (12"to 16")
to the right or left. It is recommended that the microphone be
installed on the vertical mullion of the window.
•Use one external speaker. Install above the head of the customer
in a position where the sound can be clearly heard. Use a type of
speaker suitable for your needs.
Impedance: 4 to 8 Ω
Rated input: 3 W or more
Maximum input: 6 W or more
•Lay out the wires within the mullion, or use a raceway.
1. If liquid or moisture gets into the microphone it could result
in a malfunction, so select the installation position carefully.
2. The optional microphone is not water-resistant.
[1]
[2]
[1]


Find Your Products By Category
- Household Appliance
- Power Tools
- Computer Equipment
- Automotive
- TV and Video
- Outdoor Cooking
- Marine Equipment
- Kitchen Appliance
- Fitness & Sports
- Lawn and Garden
- Baby
- Laundry Appliance
- Personal Care
- Home Audio
- Photography
- Video Game
- Portable Media
- Musical Instruments & Equipment
- Communications
- Car Audio and Video
Please Login
