
0
Owner's of the Aiphone Intercom System GT-2C gave it a score of 0 out of 5. Here's how the scores stacked up:


- 17 -
3UUUUUU
6(1625$&7,9$7('
5(6(7
SECURITY
ABSENCE SECURITY
PRESENCE SECURITY
[ S1 S2 S3 ]
:ON :ALARM ACTIVATED
START
SECURITY
SENSOR2 [ ENABLE ]
SELECT SENSOR TO BE ON ALART.
SENSOR1 [ ENEBLE ]
SENSOR3 [ DISABLE ]
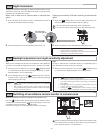
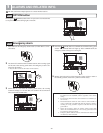
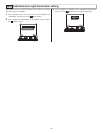
External calls9-3
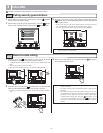
1 When a separately-installed sensor is activated or the CALL button is
pressed, the alarm sounds, and the warning screen displays on the
monitor and blinks.
• Only the alarm sounds at sub master monitor stations.
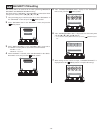
2 Press the [ OFF] button or [ REC/PLAY] button ([ OFF] but-
ton for GT-2H-L/GT-2H) to stop the alarm sound.
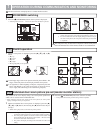
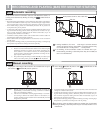
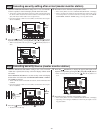
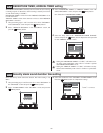
PRESENCE SECURITY, ABSENCE SECURITY setting (master monitor station)9-4
2 Select "SECURITY" in the "MENU" screen, and press the [
MENU] button.
1 In the standby mode, press the [ MENU] button.
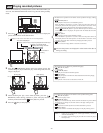
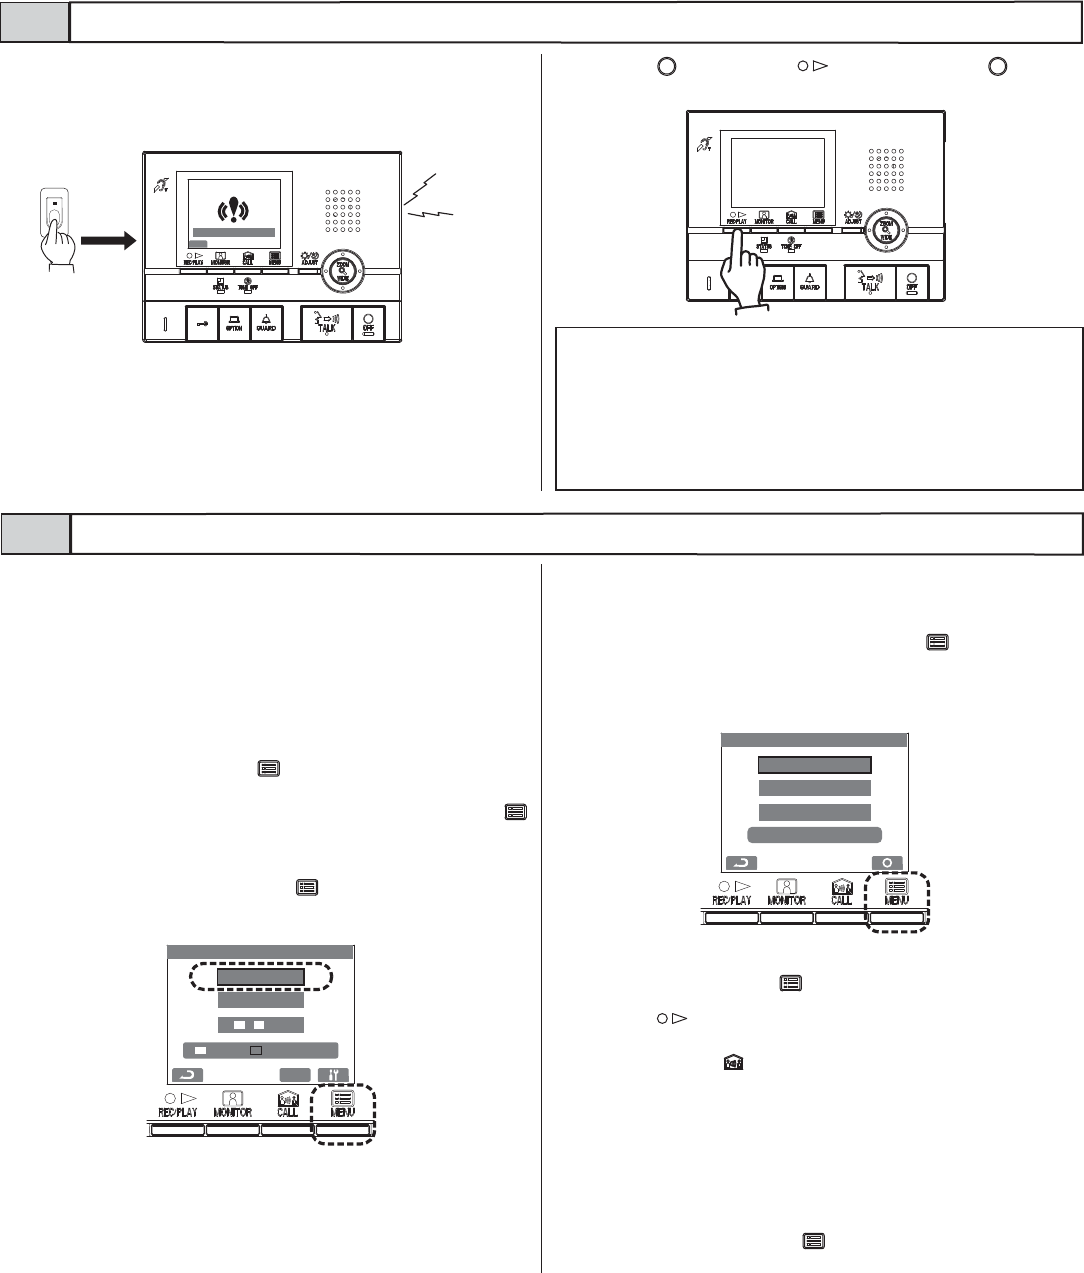
4 In the "SECURITY" screen, confirm the locations that are on alert
among sensors 1 through 3 (only sensors for which security settings
have been performed will display). To change settings, move the cur-
sor to the location to be changed and press the [ MENU] button.
• Locations will display according to the locations selected when settings
were performed last.
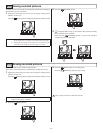
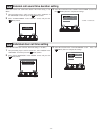
7 PRESENCE SECURITY is set. For "ABSENCE SECURITY", "AB-
SENCE SECURITY" is set after the set time elapses.
• The STATUS LED blinks with a medium interval.
• If there are no operations for approximately 1 minute, the screen display
will end.
• If selected locations are open, they will display in red and "CHECK STA-
TUS SENSOR" will display on the screen.
• To cancel settings, press the [ MENU] button (cancel) at the step 3
screen.
6 Press the [ REC/PLAY] button to return to the step 3 screen, move
the cursor with "PRESENCE SECURITY" or "ABSENCE SECURI-
TY" and press the [ CALL] button.
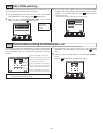
5 Select "ENABLE" or "DISABLE" in the "SECURITY" screen for
each sensor, and press the [ MENU] button.
3 Select "PRESENCE SECURITY" or "ABSENCE SECURITY" in the
"SECURITY" screen, and press the [ MENU] button.
(Ex.: Selection of "PRESENCE SECURITY")
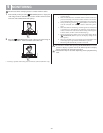
Set the security settings for individual doors and windows. By security
settings, intrusions at individual doors or windows will be detected and a
security alarm will sound.
• PRESENCE SECURITY
Security setting for when resident is at home sleeping that is applied im-
mediately after setting.
• ABSENCE SECURITY
Security setting for when resident is away that is applied after the delay time
(section 10-9) elapses after setting.
NOTES: 1. The alarm sound time is set in the external settings. (Refer to sec-
tion 10-5.)
The initial setting is 10 minute.
2. When the alarm sound time is set for 1 hour or for the alarm to
sound continuously, the monitor warning screen will go out after
approximately 10 minutes.
3. Even if the call tone volume is set to 0 (OFF), it will sound at a
level equivalent to 10 (HIGH).


Find Your Products By Category
- Household Appliance
- Power Tools
- Computer Equipment
- Automotive
- TV and Video
- Outdoor Cooking
- Marine Equipment
- Kitchen Appliance
- Fitness & Sports
- Lawn and Garden
- Baby
- Laundry Appliance
- Personal Care
- Home Audio
- Photography
- Video Game
- Portable Media
- Musical Instruments & Equipment
- Communications
- Car Audio and Video
Please Login
